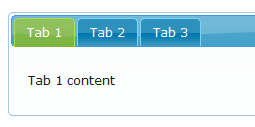
With the release of mojoPortal 2.3.0.4 came the addition of Content Templates for FCKeditor and the examples included with mojoPortal for using the Content Templates were widgets like jQuery Accordian and Tabs. I like the Accordian and Tab widgets quite a bit because they allow me to easily include a very professional looking UI elements with very little work. Examples of the jQuery Accordian and Tabs are below:

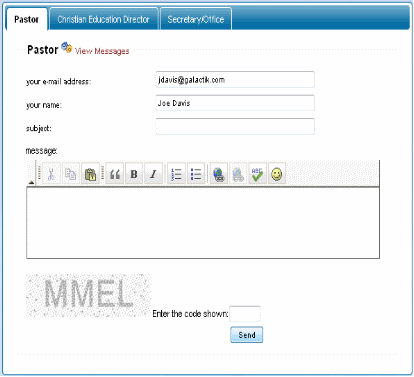
The first idea I had for using the widgets was to include a couple different contact forms on one page, each with its own tab. So I set out creating the 3 different Contact Form instances that I needed. I was doing this for my church so I had one for the Pastor, Christian Ed. Director and the Secretary. I then created an HTML Content instance on the Contact Us page and added the Tabs UI widget to the HTML content. Now this is when I ran into a problem; there isn't any way to reference a mojoPortal module from within another module, so I had no way to put the Contact Form instances inside the UI widget.
I looked throught the documentation on the mojoPortal site but couldn't find anything that I thought would lead me in the right direction so I posted a question in the forum asking for help. Joe Audette, mojoPortal's founder and chief developer, responded with a very elegant solution. All I needed to do was create a my own module that included the Tab widget with the Contact Form instances wrapped up inside. Being the great guy he is, Joe provided me with the necessary code to make this work. The process is very simple:
- Create a text file named whateveryoulike.ascx
- Paste this code into the text file:
<%@ Control Language="C#" ClassName="MultiModuleInTabsModule.ascx" Inherits="mojoPortal.Web.SiteModuleControl" %>
<%@ register assembly="AjaxControlToolkit" namespace="AjaxControlToolkit" tagprefix="portal" %>
<%@ Import Namespace="mojoPortal.Business" %>
<%@ Import Namespace="mojoPortal.Business.WebHelpers" %>
<%@ Import Namespace="mojoPortal.Web.Framework" %>
<%@ Import Namespace="mojoPortal.Web.Controls" %>
<%@ Import Namespace="mojoPortal.Web.Editor" %>
<%@ Import Namespace="mojoPortal.Net" %>

<script runat="server">
	protected void Page_Load(object sender, EventArgs e)
	{
	}
</script>

<div class="mojo-tabs">
	<ul>
		<li><a href="#tab1">Tab 1</a></li>
		<li><a href="#tab2">Tab 2</a></li>
		<li><a href="#tab3">Tab 3</a></li>
	</ul>
	<div id="tab1">
		<asp:Panel ID="pnlModuleWrapper1" runat="server">
			<portal:ModuleWrapper ID="ModuleWrapper1" runat="server" ConfigureModuleID="15" />
		</asp:Panel>
	</div>
	<div id="tab2">
		<asp:Panel ID="pnlModuleWrapper2" runat="server">
			<portal:ModuleWrapper ID="ModuleWrapper2" runat="server" ConfigureModuleID="16" />
		</asp:Panel>
	</div>
	<div id="tab3">
		<asp:Panel ID="pnlModuleWrapper3" runat="server">
			<portal:ModuleWrapper ID="ModuleWrapper3" runat="server" ConfigureModuleID="17" />
		</asp:Panel>
	</div>
</div>
- Find the ModuleID for each Contact Form instance and modify the ModuleWrapper controls in the code above to match the correct ModuleIDs.
Note: To find the correct ModuleIDs all you need to do is hover over the Edit or Settings link for the Contact Form instances and then look in your browser's status bar. The ModuleID will show as mid=SomeNumber.
- Save the file you created in the first step to the "~\data\sites\[sitenumber]\Modules" directory. (Note: you can save the file to any directory in the mojoPortal application but I think it is best that you save it to a directory under your actual site in the Data directory because this will prevent it from being overwritten or accidentally deleted during upgrades.
- Install your newly created module via the Administration > Advanced Tools > Feature Installation/Configuration screen inside of your mojoPortal site.
- This is rather straight forward. All you have to do is give your Module a name, and input the correct path in the Control Source field. You may want to create your own GUID to make sure that it is unique.
- Now you can add your new module to any page you like just as you would add any other module to a page.
Here’s a screenshot of the end result:
Happy mojo-ing!